Documentation
Installing SLS toolbox
The SLS toolbox has been implemented as a SPM external library. Installing SLS toolbox into the SPM environment is straightforward. Download the toolbox, and extract it into a folder. These are the required steps to run SLS inside the SPM bundle.
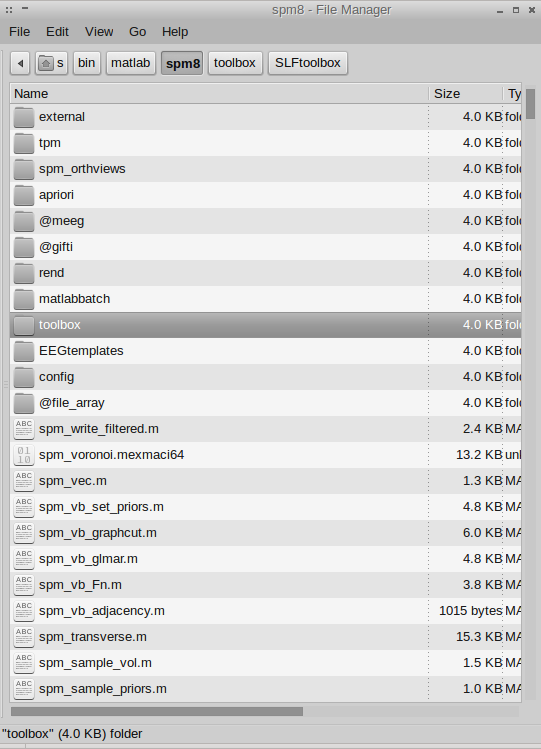
- On SPM, all external libraries are installed into the toolbox folder. This folder is located inside the main SPM directory. Just find where SPM8 was installed and open the toolbox folder.
- Download the toolbox, and extract it into the spm/toolbox folder.
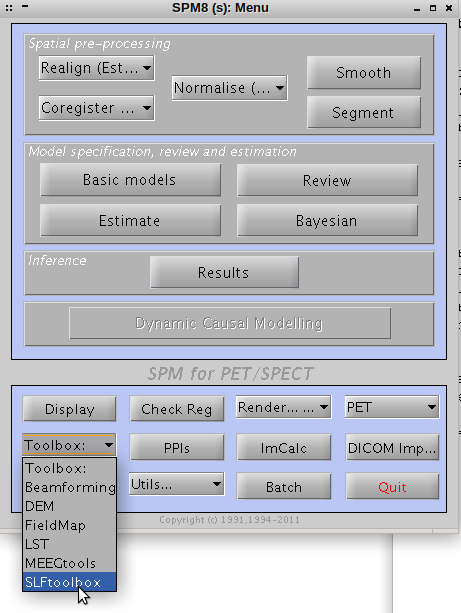
- Open MATLAB as usual, and type spm in the command-prompt.
- This will open the main SPM8 menu. Hence, on the Toolbox list, select the SLStoolbox.
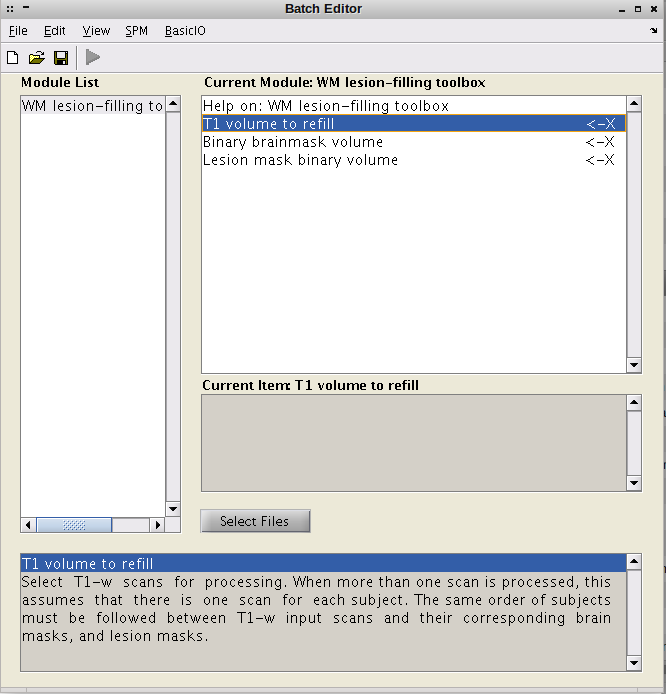
- The SPM batch editor will be opened containing the SLStoolbox program.
Using SLS toolbox
- The program requires two input images:
- A T1-w image.
- A FLAIR image.
- The resulted lesion-filled image will be saved in the same directory of the input T1-w image.